
Description:
This document describes the procedure for storing your own Web site in the Public Spot module in order to adapt the layout to your own needs. Templates are provided to help you with the design.
This document explains how you save your own Web sites to the LANCOM and how they are incorporated into the configuration.
We will also demonstrate ways of suppressing the security warnings about SSL certificates which browsers can display when accessing the LANCOM via HTTPS.
Requirements:
- LANtools as of version 7.80 (download latest version)
- LCOS as of version 7.80 (download latest version)
- A LANCOM WLAN controller, LANCOM WLAN router or LANCOM Access Point with activated LANCOM Public Spot Option
- Web browser with JavaScript support
Procedure:
Designing the Web pages:
You can use the following Web-page templates to design your Public Spot Web site. They can be adapted to suit your design needs.
There are Public Spot templates for LCOS up to and including version 10.72 and templates for LCOS as of version 10.80 RU1.
After an update from LCOS up to and including version 10.72 to LCOS as of version 10.80 RU1 the old templates aren't functional anymore. In this case the new templates must be used. Vice versa the new templates aren't functional in devices with LCOS up to and including version 10.72. With LCOS 10.80 Rel neither the old, nor the new templates are functional. In this case, be sure to perform an update to at least LCOS 10.80 RU1 and use the new templates!

Public Spot templates as of LCOS 10.80 RU1:
The ZIP files contains the following Public Spot templates:
- Welcome (welcome.htm)
- Login (login.htm)
- Error (error.htm)
- Start (start.htm)
- Status (status.htm)
- Logoff (logoff.htm)
- Help (help.htm)
- No proxy (no_proxy.htm)
- Voucher (voucher.html, Voucher_Non_Internet Explorer.html )
- terms of use (terms_of_use.htm)
- Fallback (fallback.htm)
The follwoing templates are available as of LCOS version 8.84:
- Registration (email) (registration_email.htm)
- Login (email) (login_email.htm)
- Registration (SMS) (registration_sms.htm)
- Login (SMS) (login_sms.htm)
If you have the LANCOM Public Spot connected to a PMS system and want to include PMS-specific parameters on the login-page, you must add thoss parameters manually in the login template.
Adapting the templates:
A text editor can be used to adapt the templates. Various editors are available for free which can highlight html/css syntax, including Notepad++ or PSPad. To detect the RGB color values of existing logos or web sites, we recommend the freeware program Color Detector.The template pages are generally divided into three areas; header, content, and footer.
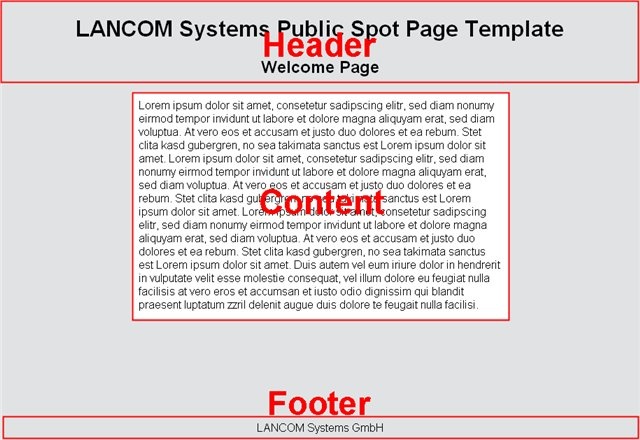
| Area | Description |
| Header | Headlines and image/logo |
| Content | The actual content of the page |
| Footer | The bottom of the page |
These same areas are also to be found in the source code, which is a help for orientation when designing the page. The relevant areas that can be adapted are marked with /*Comment*/ (in the CSS part) and <!-- Comment --> (in the HTML part).The page's layout and the color scheme are set near the top of the source code between the <style> tags.
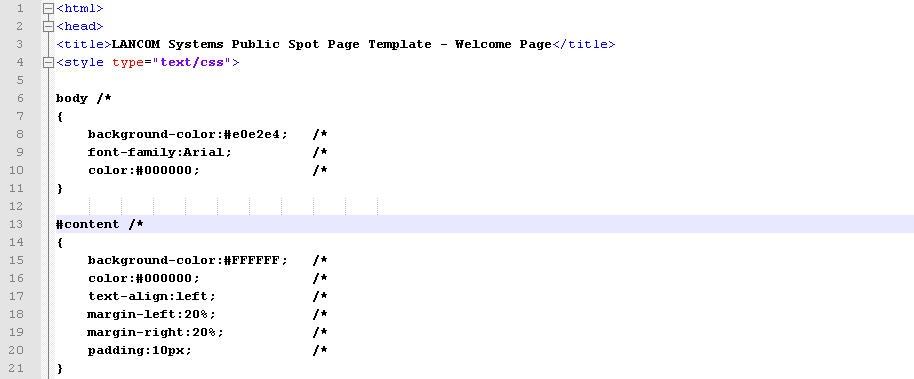
The page's text content is entered into the area between the <body> tags.
The font and color of the text as well as the background color are easily adapted. Colors are set as hexadecimal RGB values.
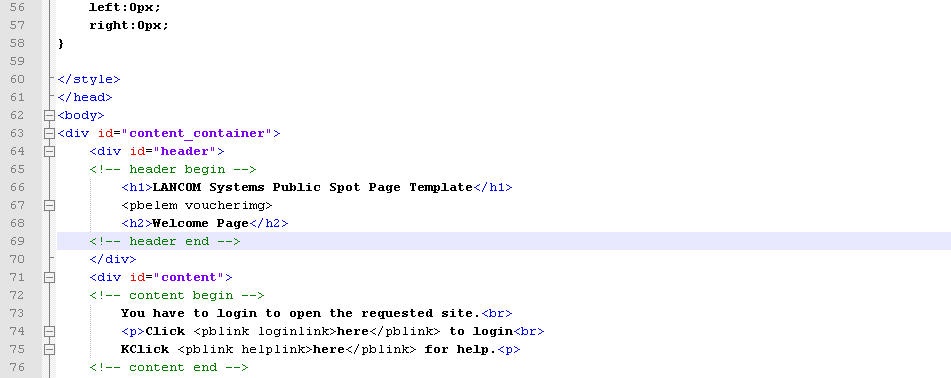
Various elements included in the code are for interpretation by the LANCOM router (<pbelem>, <pblink>, etc.). This ensures, for example, that the logo and login form are only displayed if the page is called via the internal web server. The function of this tag is documented in the source code.
Inserting images:
The LANCOM device can store an image/logo for the Public Spot page. The image in incorporated into the source code by the element <pbelem vouchering>. Once an image has been uploaded, it will be used in the default pages.
The available resolutions are set by the CSS file of the device. The pre-installed default graphics allow for 800x150 px for the large screen and 258x52 px for the small screen. The file type must be either JPG, GIF, or PNG.
If you don't want to use a header image, load the following file into the LANCOM router.
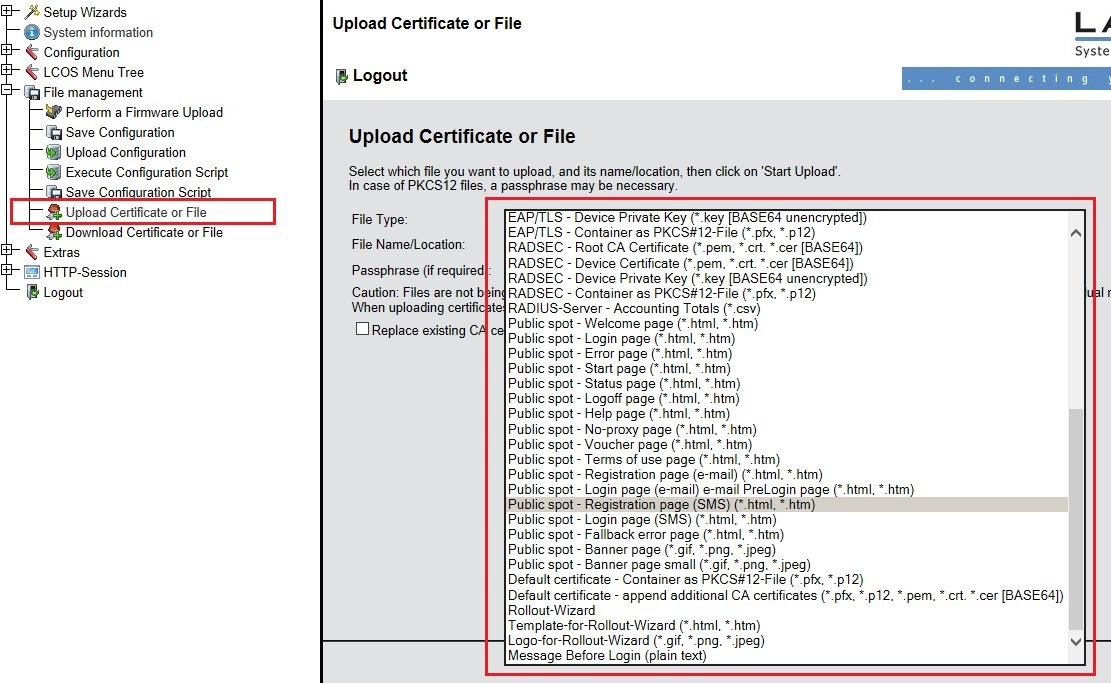
Uploading your own Web pages:
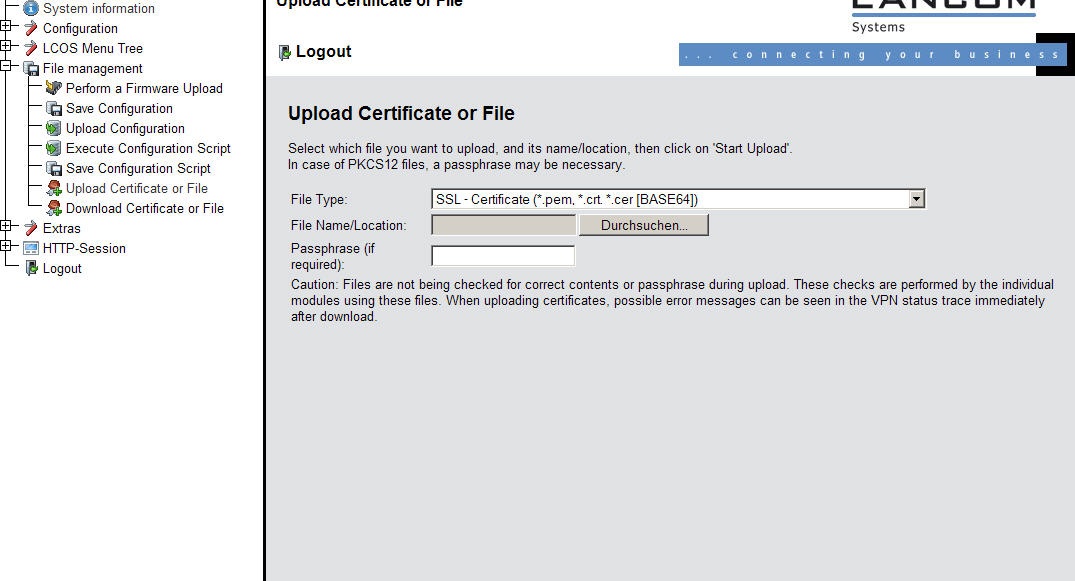
In WEBconfig, the Public Spot pages are uploaded under File management → Upload certificate or File.
Linking your web site in the configuration:
After upload, a link must be set which points to the page. For this purpose use the following URLs:
| Name | Reference |
| Welcome | file://pbspot_template_welcome |
| Login | file://pbspot_template_login |
| Error | file://pbspot_template_error |
| Start | file://pbspot_template_start |
| Status | file://pbspot_template_status |
| Logout | file://pbspot_template_logoff |
| Help | file://pbspot_template_help |
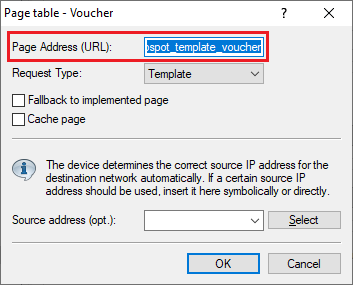
| Voucher | file://pbspot_template_voucher |
| Proxy | file://pbspot_template_noproxy |
| General terms & conditions | file://pbspot_template_agb |
| Registration (email) | file://pbspot_template_reg_email |
| Login (email) | file://pbspot_template_login_email |
| Registration (SMS) | file://pbspot_template_reg_sms |
| Login (SMS) | file://pbspot_template_login_sms |
| Backup Error Page | file://pbspot_template_fallback |
1. Use LANconfig to open the configuration and go to the menu Public Spot → Server → Page table.

2. Enter the URL in the field Page Address (URL).
3. Once set up and linked, the web pages will be displayed.
Using files saved on USB:
Preparing the USB storage medium:
The following describes how to set up a USB medium for operating with a LANCOM device:
- File system: Format the USB medium with the FAT16 or FAT32 file system.
- Base directory: Create the directory public_html on the USB medium. In the default setting, the HTTP server in LCOS only accesses files in that directory and its subdirectories (e.g. a subdirectory called firmware). All other files on the USB medium are ignored.
- USB connection: Connect the mass storage device to the USB connector on the LANCOM device.
If the template page should be accessed on a USB stick, it has to be referenced as follows:
http://127.0.0.1/filesrv/usb/Name.html
http://127.0.0.1/filesrv/usb/Name.html

To load the template image into the HTML page from the USB stick, the HTML reference is as follows:
http://192.168.134.1/filesrv/usb/bild.jpeg
http://192.168.134.1/filesrv/usb/bild.jpeg
Security notice for the SSL-HTTPS certificate:
Problem:
The integrated HTTPS page features an SSL certificate. This certificate is issued with www.lancom-systems.de as the CN. When the LANCOM is accessed with HTTPS, the browser displays a security warning stating that the SSL certificate does not agree with the name or IP address being accessed.
Solution 1:
Here, too, you can use WEBconfig to use and upload your own SSL certificate. This SSL certificate should be issued by a public certification authority such as VeriSign. This is because the root certificates of public certification authorities are already available in many Web browsers.
Select the file type SSL certificate and use Browse to find the certificate file:
Solution 2:
In the default setting, HTTPS is used to deliver and communicate with the Public Spot login page. This can be switched to HTTP in the configuration. No security warning is displayed as no SSL certificate is transferred and checked.
Note:
If the Public Spot login page communicates via HTTP, the login information (username and password) are transferred unencrypted.
If the Public Spot login page communicates via HTTP, the login information (username and password) are transferred unencrypted.
By uploading the script located below, you can switch to accessing the Public Spot login page via HTTP.
set /Setup/Public-Spot-Module/Login-Page-Type HTTP
set /Setup/Public-Spot-Module/Login-Page-Type HTTP

This script can be uploaded with the help of LANconfig. Highlight the device and, from the context menu (right mouse button), select the menu item Configuration management → Restore script from file.